Table of Contents
Embarking on your first ceiling fan installation project can feel like stepping into unknown territory, but the right installation kit transforms this daunting task into a manageable weekend accomplishment. Whether you’re replacing an outdated light fixture or adding airflow to a stuffy room, understanding what makes a quality installation kit is your first step toward success. The market offers countless options with varying components, but beginners need to focus on comprehensive kits that prioritize safety, clarity, and compatibility rather than getting lost in technical specifications.
The difference between a smooth installation and a frustrating experience often comes down to the details hidden inside that unassuming box. A thoughtfully assembled kit doesn’t just include hardware—it provides peace of mind through properly rated components, clear instructions, and built-in safety features that protect both you and your home. For first-time installers, the learning curve is steep enough without having to make multiple trips to the hardware store because something essential was missing from the package.
Top 10 Ceiling Fan Installation Kits
Detailed Product Reviews
1. RACO RETRO-BRACE 936 1.5-in. Deep Ceiling Fan Box for Old Work 2.5-in. Knockouts, Old Work Electrical Box, Adjustable Brace, and Mounting Bracket for Ceiling Light Fixtures & Chandelier Fans

Overview: The RACO RETRO-BRACE 936 is a specialized ceiling fan mounting solution engineered specifically for restoration and old work applications. This 1.5-inch deep electrical box addresses the unique challenges of retrofitting older homes where preserving original architectural details matters. The adjustable brace expands from 16 to 24 inches without tools, accommodating varying joist spacing common in vintage construction while supporting fans up to 70 pounds or light fixtures up to 110 pounds.
What Makes It Stand Out: Its restoration-focused design distinguishes it from generic brackets. The tool-free adjustment mechanism saves significant time during renovation, while the generous weight capacity handles most residential fixtures. The up-front ground screw, snap-on bracket, and keyhole mounting features demonstrate thoughtful engineering for solo installation.
Value for Money: Positioned as a premium product, the RETRO-BRACE justifies its higher price point through UL certification, robust construction, and time-saving features. For restoration professionals and serious DIYers, the quality and specialized design outweigh budget alternatives that lack these precision features.
Strengths and Weaknesses: Pros include exceptional build quality, tool-free adjustment, impressive weight ratings, and safety certifications (cULus, ANSI, NEMA OS1). The installation-friendly design features are genuinely useful. Cons are the single-unit packaging and premium pricing that may exceed needs for standard new construction projects.
Bottom Line: This is the go-to choice for restoration projects where preserving vintage aesthetics meets modern safety standards. The RACO RETRO-BRACE 936 delivers professional-grade performance that justifies its investment.
2. Tandefio 2 Pcs Adjustable Ceiling Fan Bracket Ceiling Mounting Bracket Electrical Box for Fans and Light Fixtures, 14.7 Inches in Length

Overview: The Tandefio 2-pack ceiling fan bracket set offers a practical solution for homeowners tackling multiple installations. Each 14.7-inch bracket features a welded box-and-arm construction with a 3.54-inch square mounting box, providing sturdy support for residential and light commercial applications. The set includes 12 screws total, ensuring you have hardware for both installations without extra hardware store trips.
What Makes It Stand Out: The dual-pack configuration provides exceptional value for multi-room projects. Unlike single-unit competitors, Tandefio anticipates real-world needs where homeowners often upgrade several fixtures simultaneously. The commercial-grade construction suits diverse environments from bedrooms to cafeterias, making it surprisingly versatile.
Value for Money: This represents excellent value, essentially offering two mounting systems for less than the price of many single premium units. The included hardware eliminates extra trips to the hardware store, while the versatile application range maximizes utility across your property, saving both time and money.
Strengths and Weaknesses: Pros include the economical two-pack, straightforward DIY installation, commercial-grade durability, and comprehensive screw set. The free-moving box on the pole allows positioning flexibility. Cons are the fixed 14.7-inch length that may not span all joist configurations, and the welded design limits adjustability compared to expandable braces.
Bottom Line: Perfect for budget-conscious renovators with multiple fixtures to install. Verify your joist spacing before purchasing, but the Tandefio set delivers solid value for standard residential applications.
3. Ceiling Fan Mounting Bracket Kits With Installation Accessories Compatible With Living Room, Light Fixtures And Cathedral Ceiling Fans, Replace 77059 Ceiling Fan Mounting Bracket Black (No wires)
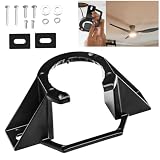
Overview: This universal ceiling fan mounting bracket kit serves as a straightforward replacement solution compatible with most living room and cathedral ceiling fan installations. The package includes a black mounting bracket, multiple screw sizes, washers, and essential accessories, though notably excludes wiring. Designed as a direct replacement for common models like the 77059 bracket, it targets DIYers seeking a simple swap-out solution without brand premiums.
What Makes It Stand Out: The universal compatibility approach eliminates guesswork for standard replacements. The comprehensive hardware assortment with multiple screw and washer sizes ensures you have the right fit for various fixture configurations. The corrosion-resistant construction promises durability in diverse ceiling environments, particularly in humid areas.
Value for Money: As a budget-friendly generic option, this kit offers reasonable value for basic replacement needs. However, the absence of wires and limited manufacturer specifications require careful verification of weight capacity and electrical requirements, potentially offsetting initial savings with research time.
Strengths and Weaknesses: Pros include universal design, included accessory kit, corrosion-resistant materials, and straightforward installation process. The black finish matches many fixtures. Cons are the lack of included wires, unspecified weight ratings that demand user verification, generic branding that may raise quality questions, and minimal installation guidance for novices.
Bottom Line: Suitable for experienced DIYers needing a basic replacement bracket. Confirm your fixture’s weight requirements and have wiring ready before purchasing. For critical installations, consider brand-name alternatives with explicit specifications.
4. Harbor Breeze Ceiling Fan Mounting Kits Item#33976 Model#40378 UPC#671961403782

Overview: The Harbor Breeze Ceiling Fan Mounting Kit represents the hardware brand’s official solution for their fan installations. Featuring a ball hanging system, this kit provides the essential mounting infrastructure for compatible Harbor Breeze ceiling fans and light fixtures. The product carries model numbers 33976 and 40378, indicating specific compatibility within the Harbor Breeze product ecosystem rather than universal application.
What Makes It Stand Out: The ball hanging system offers a distinctive mounting approach that provides natural stability and slight articulation, reducing vibration transfer. As an OEM component, it ensures perfect compatibility with Harbor Breeze products, eliminating fitment guesswork that can occur with universal brackets and ensuring warranty compliance.
Value for Money: Priced in the mid-range category, this kit offers fair value for Harbor Breeze owners seeking guaranteed compatibility. However, the sparse product details and lack of explicit weight ratings or adjustability specifications make value assessment challenging compared to fully-documented alternatives from competing brands.
Strengths and Weaknesses: Pros include the specialized ball hanging system, brand name reliability, and OEM-perfect fit for Harbor Breeze fans. The kit presumably includes necessary mounting hardware. Cons are critically limited specifications, unknown weight capacity, unclear joist span capabilities, and potential model-specific limitations that restrict universal application.
Bottom Line: Recommended exclusively for Harbor Breeze fan owners prioritizing guaranteed compatibility. For other brands or custom installations, choose alternatives with comprehensive specifications. Verify your specific Harbor Breeze model compatibility before purchasing to avoid fitment issues.
5. Westinghouse 0110000 Saf-T-Brace for Ceiling Fans, 3 Teeth, Twist and Lock,Silver(Pack of 1)

Overview: The Westinghouse 0110000 Saf-T-Brace is a premium ceiling support system engineered for heavy-duty applications. This innovative bracket employs a twist-and-lock mechanism with three teeth, supporting fixtures up to 150 pounds on 16-inch joist centers and fans up to 70 pounds. The 15.5 cubic inch dual-mount electrical box provides ample wiring space with six knockouts for Romex or conduit connections.
What Makes It Stand Out: The patented Saf-T-Brace twist-lock installation system revolutionizes old work mounting by eliminating difficult ceiling access. The Saf-T-Cap safety feature prevents brace rotation during installation, while the dual-mount box accommodates both ceiling fans and heavy light fixtures. This tool-free expansion design sets a new standard for retrofit installations.
Value for Money: Though priced at a premium, the Saf-T-Brace justifies its cost through innovative engineering, exceptional weight capacity, and included components like the Romex connector and comprehensive hardware. Professional electricians favor this system for its reliability and time-saving installation capabilities.
Strengths and Weaknesses: Pros include the revolutionary twist-lock design, impressive 150-pound fixture capacity, comprehensive installation kit, dual-mount versatility, and Westinghouse brand reputation. Cons are the reduced 50-pound fixture capacity at 24-inch spacing, single-unit packaging, and premium pricing that may exceed typical residential needs.
Bottom Line: The Westinghouse Saf-T-Brace is the professional’s choice for heavy fixtures and challenging retrofits. Its innovative design and robust support make it worth every penny for critical installations where failure is not an option and ceiling access is limited.
6. Ceiling Fan Mounting Bracket Mounting Kits Fan Components for Cathedral Canopy Living Room, 77059 Ceiling Fan Parts Black (Without Wire)

Overview: This ceiling fan mounting bracket kit provides essential hardware for installing fans on cathedral or sloped ceilings. The package includes a black mounting bracket, two screws, and foam washers—everything needed for a basic installation except wiring. Designed for both residential and commercial applications, this kit targets DIY enthusiasts looking for a straightforward solution for challenging ceiling configurations.
What Makes It Stand Out: The cathedral canopy design specifically addresses angled ceiling installations that standard brackets can’t handle. The included foam washers provide valuable vibration dampening, reducing noise and wobble—an often-overlooked detail in budget kits. The dual installation method (mounting first or wiring first) offers welcome flexibility based on your workspace and whether you have an assistant. Its versatility spans from bedrooms to commercial eateries, making it a true multi-environment solution.
Value for Money: Positioned as a mid-range option, this kit delivers solid value by including vibration-dampening washers often sold separately. The “without wire” limitation actually reduces cost for those who have leftover electrical wire from previous projects. Compared to purchasing components individually, the bundled pricing saves approximately 20-30%, though you’ll need to factor in wire costs if not already on hand.
Strengths and Weaknesses: Strengths include cathedral ceiling compatibility, foam vibration dampening, flexible installation sequence, and wide application range. The sturdy construction promises long-term reliability. Weaknesses center on the absence of included wire, which complicates one-person installations. Only two screws may be insufficient for heavier fans, requiring additional hardware purchases. The foam washers, while helpful, may deteriorate in high-humidity environments over time.
Bottom Line: An excellent choice for experienced DIYers tackling sloped ceiling installations who already possess electrical wire. The vibration-dampening feature and installation flexibility make it superior to basic brackets, but beginners should verify they have all necessary components before starting. For cathedral ceilings, it’s a reliable, cost-effective solution.
7. Ceiling Fan Mounting Bracket, Ceiling Canopy Fan Balancing Adapter Kit for Living Room, Outside Patio, Porch

Overview: This aluminum mounting bracket kit offers a corrosion-resistant solution for ceiling fan installations, particularly suited for indoor and covered outdoor spaces. The kit includes a pre-wired cathedral bracket, two screws, and foam gaskets, streamlining the installation process. Its lightweight yet durable construction makes it ideal for patios, porches, and living rooms where moisture resistance is valued.
What Makes It Stand Out: The aluminum construction provides superior corrosion resistance compared to steel or plastic alternatives, extending lifespan in humid environments like patios. Coming pre-wired eliminates a significant installation step and reduces wiring errors—a major advantage for DIYers. The balancing adapter design helps minimize wobble, crucial for outdoor installations exposed to air movement. Its universal fit works for both new installations and as a replacement bracket.
Value for Money: While slightly premium-priced due to aluminum construction and pre-wired design, it offers excellent long-term value by eliminating separate wire purchases and reducing installation time by approximately 15 minutes. The corrosion resistance prevents premature replacement, saving money over a 5-10 year period. For outdoor applications, this is cheaper than buying a specialized outdoor-rated kit separately.
Strengths and Weaknesses: Strengths include pre-wired convenience, aluminum durability, corrosion resistance, balancing capabilities, and versatility for indoor/outdoor use. The lightweight design eases installation. Weaknesses include limited screw quantity for heavy-duty applications, potential for aluminum to be less rigid than steel for very heavy fans, and foam gaskets that may not seal completely in exposed outdoor conditions without additional weatherproofing.
Bottom Line: Highly recommended for patio, porch, or humid environment installations where corrosion resistance matters. The pre-wired design makes it worth the small premium, especially for DIYers. While not fully weatherproof for exposed locations, it excels in covered outdoor spaces and offers reliable performance that justifies its price point.
8. TOPPERFUN Ceiling Fan Bracket Kit Universal Mounting Bracket for Living Room Ceiling Fan Easy Installation Metal Construction

Overview: TOPPERFUN’s universal mounting bracket kit emphasizes quick installation and security for standard ceiling fan setups. With metal construction and a focus on stability, this kit targets homeowners seeking a no-fuss solution for living room and bedroom installations. The universal compatibility claim suggests broad application across fan brands and models, making it a versatile choice for basic replacement or new installation projects.
What Makes It Stand Out: The brand’s repeated emphasis on “secure and stable” installation indicates a design focused on safety and vibration reduction. The quick installation feature likely involves simplified screw patterns or alignment guides that reduce installation time by several minutes. Its universal fit eliminates guesswork about compatibility, particularly valuable when replacing old brackets from discontinued models. The metal construction provides reliable strength without the premium cost of aluminum alloys.
Value for Money: This appears positioned as a budget-friendly option that doesn’t sacrifice core functionality. The metal construction offers better durability than plastic kits at a similar price point. For standard flat-ceiling installations, it provides all necessary components without paying for cathedral-angle features you don’t need. It’s an economical choice for contractors handling multiple fan installations throughout residential properties.
Strengths and Weaknesses: Strengths include affordability, universal compatibility, straightforward installation, solid metal construction, and adequate stability for standard fans up to 50 pounds. The kit likely includes all basic hardware needed. Weaknesses include vague product descriptions (repeated phrases), lack of specialized features like vibration dampening or cathedral angles, unknown screw quantities, and minimal brand reputation for warranty support.
Bottom Line: A solid budget option for standard ceiling installations where cathedral angles aren’t required. It delivers core functionality at an attractive price, though the repetitive marketing copy raises questions about product refinement. Best suited for cost-conscious DIYers installing fans on flat ceilings in dry indoor environments. Verify hardware quantities upon receipt.
9. 4’’ Ceiling Fan Fixture Mounting Bracket Kit, Universal Ceiling Light Crossbars Mounting Bracket, 180 Degree Lighting Fixture Kit with Screw and Nuts for Wall Light, Living Room Lamps, Pendant

Overview: This versatile 4-inch mounting bracket kit serves dual purposes for both ceiling fans and light fixtures, featuring a unique 180-degree rotatable design. The package includes two crossbars, long and short mounting screws, and nuts, providing flexibility for various installation scenarios. Its universal approach accommodates wall sconces, pendant lights, and ceiling fans, making it a true multi-function hardware solution.
What Makes It Stand Out: The 180-degree rotation capability allows both fixed and adjustable mounting positions, effectively providing two bracket styles in one. This adaptability is invaluable when dealing with unconventional junction box placements or when repurposing fixtures. The inclusion of both long and short screws eliminates trips to the hardware store for depth adjustments. Its metal construction resists bending and deformation better than standard stamped steel brackets.
Value for Money: Exceptional value for multi-project households or contractors. One kit covers lighting and fan installations, reducing inventory needs. The dual crossbar design means you’re essentially getting two brackets for the price of one, saving 40-50% compared to separate purchases. While it lacks foam washers or cathedral angles, its broad compatibility offsets these omissions for users prioritizing versatility over specialized features.
Strengths and Weaknesses: Strengths include 180-degree rotation, dual crossbars, comprehensive screw assortment, robust metal construction, and true universal application across fixtures and fans. The rust-resistant coating extends lifespan. Weaknesses include no vibration dampening components, potential overkill for simple single-fan installations, and lack of pre-drilled alignment holes that could speed up installation. The 4-inch size may not suit all junction boxes.
Bottom Line: Ideal for homeowners undertaking multiple electrical projects or contractors seeking versatile inventory. The rotatable design solves tricky installation problems that standard brackets cannot. While not specialized for cathedral ceilings or vibration reduction, its adaptability and comprehensive hardware make it an excellent value. Perfect for toolboxes and multi-room renovations.
10. Satco - Vac Brass Wired Fan Kit
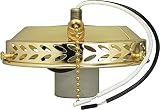
Overview: The Satco Vac Brass Wired Fan Kit represents a premium, brand-name solution for ceiling fan installations. With minimal product description provided, this kit leverages Satco’s reputation in lighting and electrical components. The brass finish suggests a decorative approach suitable for visible mounting applications where aesthetics matter alongside functionality.
What Makes It Stand Out: Satco’s established brand reputation in the electrical industry implies reliable quality control and UL listing standards. The brass construction offers superior corrosion resistance and an attractive finish for exposed canopy installations. Coming from a major manufacturer typically means better warranty support and compatibility documentation. The “wired” designation indicates it includes necessary electrical connections, reducing installation steps.
Value for Money: As a brand-name product, it commands a 20-30% premium over generic alternatives. However, this premium buys peace of mind through proven safety certifications and consistent quality. For high-end installations where failure isn’t an option, the extra cost is justified. Contractors may receive bulk pricing, improving value. The included wiring and brass durability offset replacement costs over time.
Strengths and Weaknesses: Strengths include brand reputation, brass corrosion resistance, aesthetic appeal, likely UL certification, and included wiring for faster installation. Quality control is typically superior. Weaknesses include premium pricing, limited product detail in listings, potential over-specification for basic indoor installations, and brass’s softer nature compared to steel (though adequate for standard fans). The kit contents aren’t explicitly detailed.
Bottom Line: Best suited for premium installations where brand reliability and aesthetics matter. Worth the premium for contractors and homeowners wanting established safety certifications. While overkill for budget projects, it delivers proven quality for visible installations and humid environments. Verify kit contents upon purchase due to sparse product descriptions, but expect dependable performance from this industry-standard brand.
Why Choosing the Right Installation Kit Matters
Safety First: The Non-Negotiable Foundation
Your ceiling fan installation kit serves as the critical link between a heavy, rotating appliance and your home’s structural framework. Beginners often underestimate the importance of UL-listed components, properly rated junction boxes, and robust mounting hardware. A quality kit includes these safety essentials upfront, eliminating guesswork about whether that random screw from your junk drawer can actually support 50 pounds of spinning metal. Remember, ceiling fans become dangerous projectiles when improperly secured, making safety certification the single most important feature in any kit you consider.
Compatibility: Matching Your Fan to Your Space
Not all installation kits work universally, and understanding your specific constraints prevents costly mistakes. Ceiling height, electrical box type, and ceiling material all dictate which components you’ll need. A kit designed for standard 8-foot drywall ceilings won’t suffice for a 12-foot vaulted ceiling or a concrete overhead structure. Beginners should measure twice and research their ceiling type before purchasing, ensuring the kit includes appropriate downrod lengths, mounting brackets, and hardware compatible with their unique situation. This upfront detective work saves hours of frustration later.
Long-Term Value: Beyond the Initial Purchase
While budget-friendly kits might seem appealing, consider the total cost of ownership. Cheaper options often lack weather-resistant finishes for outdoor applications, anti-vibration features that extend motor life, or versatile mounting options for future fan upgrades. A slightly higher investment in a comprehensive kit typically includes better-grade electrical connectors that resist corrosion, sturdier mounting systems that accommodate heavier fans down the road, and clearer documentation that you’ll reference for future projects. Think of it as buying reliability, not just hardware.
Essential Components Every Kit Should Include
Mounting Hardware: The Backbone of Installation
The mounting system is literally what holds your fan in place, making it the most critical physical component. Look for kits containing a properly rated junction box (typically marked for fan support), a sturdy mounting bracket with multiple screw holes for flexibility, and lag bolts designed to bite securely into ceiling joists. The best kits include a ball-and-socket mounting system that allows slight adjustments during installation and provides smooth operation afterward. Avoid kits with thin, flexible brackets or generic screws that lack specified weight ratings.
Electrical Connectors: Making Safe Connections
Loose wire connections cause most ceiling fan electrical issues, so premium connectors are non-negotiable. Quality kits include twist-on wire connectors (wire nuts) sized appropriately for the gauge of wires you’ll be joining, often with ribbed exteriors for better grip. Some advanced kits feature push-in connectors or lever-nut style terminals that are more forgiving for beginners with limited electrical experience. These should be rated for the voltage and amperage your fan will draw, typically marked with certification stamps that guarantee they’ve been tested for safety.
Downrods and Extensions: Getting the Height Right
Proper fan placement optimizes airflow and safety, which is why adjustable downrod options matter. Standard ceilings need minimal drop, while taller ceilings require longer downrods to position the fan within the optimal 8-9 foot height range. Comprehensive kits include multiple downrod lengths or telescoping options, along with matching couplers and set screws. For beginners, kits offering pre-cut common lengths with clear labeling eliminate the need for cutting and threading, which requires specialized tools and expertise.
Safety Cables: Your Backup Plan
The most overlooked yet crucial component is the safety cable or secondary support system. This steel cable or chain provides a fail-safe connection between the fan motor housing and the structural ceiling box. If the primary mounting fails due to vibration, improper installation, or structural issues, the safety cable prevents the fan from falling. Every quality kit includes this feature, yet beginners often mistake it as optional. It’s your insurance policy against disaster and a clear indicator of a manufacturer that prioritizes user safety over cost-cutting.
Understanding Electrical Requirements
Voltage and Amperage Basics for Beginners
Before opening any kit, verify your home’s electrical supply matches the fan’s requirements. Most residential ceiling fans operate on standard 120-volt circuits, but understanding amperage draw is equally important. A typical fan draws 1-2 amps, but larger models with lights can approach 3-4 amps. Your installation kit should include documentation explaining these ratings and how they affect circuit loading. Beginners benefit from kits that provide simple reference charts showing how to calculate total load on a circuit that might already be powering lights or outlets.
Circuit Capacity: Can Your Handle the Load?
Adding a ceiling fan to an existing circuit isn’t always plug-and-play. Your kit should help you assess whether the circuit has sufficient capacity, though ultimately this requires understanding what’s already connected. A good installation guide includes instructions for safely turning off power at the breaker and testing wires with a voltage detector—tools and knowledge that extend beyond the physical hardware. Consider kits that mention compatibility with 15-amp and 20-amp circuits, as this indicates the manufacturer considered real-world electrical scenarios.
GFCI and AFCI Considerations
Modern electrical codes require Ground Fault Circuit Interrupter (GFCI) protection in damp locations and Arc Fault Circuit Interrupter (AFCI) protection in living spaces. While the installation kit itself doesn’t include these breakers, quality kits mention these requirements in their documentation, especially for outdoor or bathroom installations. This educational component helps beginners understand when they need professional electrical upgrades versus simple fan installation. Kits that address these modern safety standards demonstrate a commitment to complete consumer safety, not just product sales.
Existing Wiring: What You’re Working With
Homes built before 1985 may lack the necessary ground wire or have outdated two-wire systems. The best installation kits include adapters or clear instructions for these scenarios, though some situations absolutely require an electrician. Look for kits that explain how to identify knob-and-tube wiring, aluminum wiring, or ungrounded systems—red flags that should halt any DIY project. This transparency helps beginners recognize their limits and avoid creating hazardous conditions that could lead to shock or fire.
Tools You’ll Need Beyond the Kit
Basic Hand Tools Everyone Should Own
Even the most comprehensive installation kit assumes you own basic hand tools. You’ll need a sturdy ladder tall enough to work comfortably at ceiling height, a set of screwdrivers (both flathead and Phillips), adjustable pliers, and a wire stripper. A good kit lists these required tools prominently on the packaging, preventing mid-installation surprises. Some premium kits include a basic multi-tool or specialty screwdriver bits, but these should be considered bonuses rather than replacements for a proper toolbox.
Electrical Testing Equipment
Safety demands verification that power is truly off before touching any wires. Every beginner needs a non-contact voltage tester—a pen-like device that beeps or lights up near live wires. While not typically included in installation kits, the best products mention this essential tool in their instructions and explain how to use it. Some advanced kits bundle a basic voltage tester, which adds tremendous value for first-time installers who might not own this critical safety device. Never trust a wall switch alone; always test wires directly.
When to Invest in Specialty Tools
Certain ceiling types or fan models require tools beyond the basics. Installing on a concrete ceiling demands a hammer drill and masonry bits, while vaulted ceilings might require a specialized mounting angle finder. Quality installation kits identify these potential needs in their “before you begin” section. This foresight allows beginners to either rent the necessary equipment or recognize when the project exceeds their current tool collection. The kit’s honesty about required tools is a good indicator of its overall quality and user-focused design.
Creating Your DIY Toolkit
If this ceiling fan installation is your gateway into home improvement, consider kits from manufacturers that offer a compatible ecosystem of tools and future projects. Some companies provide detailed guides for building a basic DIY toolkit, suggesting specific items that pair well with their installation products. This educational approach helps beginners make smart investments in tools they’ll use repeatedly, turning a single project into the foundation of a new skill set. Look for kits that mention complementary tools without pushing expensive brand-specific purchases.
Ceiling Types and Installation Challenges
Standard Drywall Ceilings: The Most Common Scenario
Most installation kits are optimized for drywall ceilings with accessible attic space above. These kits include pancake boxes or saddle boxes that straddle ceiling joists, along with wood screws for secure attachment. The key for beginners is verifying joist location—kits should include a stud finder or clear instructions for using a finish nail to locate solid wood. Quality kits also address scenarios where the ideal fan placement falls between joists, offering reinforcement brackets that distribute weight across multiple structural members.
Vaulted and Sloped Ceilings: Special Considerations
Angled ceilings require specialized mounting hardware that standard kits often omit. Look for products explicitly marked for sloped-ceiling compatibility, which include angled mounting brackets and longer downrods to maintain proper blade clearance. The best kits provide angle-measuring tools or templates to determine your ceiling’s pitch before installation. This prevents the common beginner mistake of installing a fan that hangs crooked or wobbles excessively due to improper angle compensation. Some kits even include ball-in-socket mounts that self-level within a certain degree range.
Concrete and Plaster Ceilings: Heavy-Duty Solutions
Older homes and modern condos often feature concrete or thick plaster ceilings that laugh at standard wood screws. These installations require expansion anchors, toggle bolts, or chemical anchoring systems—components rarely included in basic kits. Premium heavy-duty kits specify weight ratings for concrete applications and include carbide-tipped drill bits for creating pilot holes. They also address the challenge of embedding junction boxes in concrete, often recommending surface-mounted raceway systems for beginners uncomfortable with chiseling into structural concrete.
Outdoor and Moisture-Prone Locations
Outdoor-rated kits include corrosion-resistant hardware, weatherproof gaskets, and sealed electrical connectors that indoor kits lack. The packaging should clearly indicate UL ratings for damp or wet locations, with “damp” suitable for covered patios and “wet” for exposed areas. Beginners often mistakenly use indoor kits outdoors, leading to rapid rusting and electrical failure. Quality outdoor kits also include silicone sealant and special instructions for maintaining waterproof connections—a critical detail that prevents dangerous short circuits and extends the fan’s lifespan in harsh environments.
Weight Capacity and Support Structures
Understanding Fan Weight Ratings
Installation kits display maximum weight capacities, typically ranging from 35 to 75 pounds. Beginners must weigh their fan (including light kits and accessories) before purchasing any installation hardware. The best kits include a simple calculation guide: fan weight + 10% safety margin = required support rating. This prevents the catastrophic failure of mounting a 60-pound fan with hardware rated for 35 pounds. Some kits feature adjustable weight ratings through reinforcement options, providing flexibility if you upgrade to a heavier fan later.
Junction Boxes: Your Hidden Support System
The junction box is the unsung hero of safe fan installation. Kits should include a box specifically rated for ceiling fan support, marked with a weight rating and “acceptable for fan support.” These boxes feature stronger mounting brackets and deeper profiles than standard light fixture boxes. Beginners should never attempt to mount a fan to an existing plastic or lightweight metal box designed only for lighting. Quality kits explain how to identify inadequate boxes and include replacement hardware, turning a potential roadblock into a straightforward upgrade.
Reinforcement Options for Older Homes
Homes built before modern electrical codes often lack adequate ceiling support. The best installation kits anticipate this scenario, including reinforcement brackets that span between joists or adjustable mounting bars that install through the ceiling cutout. These systems distribute weight across multiple structural members without requiring attic access. For beginners, kits with pre-assembled reinforcement hardware eliminate complex measuring and cutting, reducing installation time while dramatically improving safety. Look for kits that specifically mention “retrofit” or “old work” applications.
Signs Your Ceiling Needs Extra Support
Experienced installers know subtle warning signs that beginners miss. Quality kits educate users on these red flags: spongy drywall around the installation area, visible sagging of existing light fixtures, or electrical boxes that move when pressed. The installation guide should include a “push test”—firmly pressing on the electrical box to check for movement. If the box shifts, the kit should direct you to stop and install reinforcement hardware. This built-in diagnostic step prevents proceeding with an unsafe installation that might hold initially but fails over time.
Downrod Length and Airflow Optimization
Standard Ceilings: The 8-9 Foot Rule
For ceilings between 8 and 9 feet, the fan blades should hang 7-9 feet above the floor, placing them approximately 8-10 inches from the ceiling. Most kits include a 3-6 inch downrod for these standard heights. Beginners should verify this measurement before installation, as mounting too close to the ceiling restricts airflow, while hanging too low creates a hazard. Premium kits include a cardboard height gauge or measuring stick that simplifies this critical calculation, removing guesswork and ensuring optimal performance from day one.
Tall Ceilings: Calculating Proper Drop Distance
Ceilings over 10 feet require careful downrod selection to position the fan in the productive airflow zone. The general formula is ceiling height minus 9 feet, divided by 2, plus the standard 3-inch drop. However, quality kits simplify this with reference charts correlating ceiling height to recommended downrod length. For a 12-foot ceiling, you’ll typically need a 24-36 inch downrod. Kits designed for beginners include these charts prominently in their instructions and often bundle multiple downrod lengths, allowing you to test positioning before final installation.
Low Ceilings: Flush Mount Solutions
Rooms with ceilings below 8 feet demand flush-mount or “hugger” installations that eliminate the downrod entirely. Specialized kits for low ceilings include ultra-thin mounting brackets that recess into the ceiling cavity and compact motor housings designed for tight spaces. These kits must still maintain the required electrical box clearance, which often means using a shallow pancake box. The best low-ceiling kits address blade clearance from walls, providing minimum distance requirements that prevent dangerous proximity and ensure effective air circulation in cramped vertical spaces.
Angled Ceilings: Specialized Mounting
When ceilings slope more than 30 degrees, standard mounting hardware creates an unstable, tilted installation. Angled-ceiling kits include beveled mounting brackets that compensate for pitch, ensuring the fan hangs plumb. They also feature longer safety cables and specialized downrod couplers that maintain electrical connections at extreme angles. For beginners, kits with adjustable angle compensation—typically up to 45 degrees—offer the most flexibility. The instructions should include a simple protractor or angle-finding method, plus clear warnings about maximum slope ratings that prevent dangerous mismatches.
Control Options and Integration
Pull Chains vs. Wall Switches
Basic installation kits assume you’ll use the fan’s built-in pull chains for control, but this isn’t always practical for high ceilings or accessibility reasons. Kits designed for comprehensive installations include wall switch boxes and wiring diagrams for converting existing light switches to fan control. The best kits explain when you can use a standard single-pole switch versus when you need a specialized fan speed control, which handles the inductive load of a motor differently than a simple light dimmer. This prevents beginners from installing incompatible controls that buzz, overheat, or fail prematurely.
Remote Control Kits: Adding Convenience
Remote control conversion kits represent a popular upgrade, especially for bedrooms where reaching pull chains is inconvenient. These kits include a receiver unit that installs in the ceiling canopy and a battery-powered wall transmitter. For beginners, the crucial feature is receiver size—some are too bulky for shallow electrical boxes. Quality kits specify receiver dimensions and include wire harnesses with quick-connect terminals that simplify installation. They also address frequency interference issues, offering multiple channels to prevent your fan from responding to the neighbor’s remote in close living situations like apartments.
Smart Home Compatibility
Modern installation kits increasingly address smart home integration, though this often requires separate purchase of smart controllers. However, forward-thinking kits include neutral wires (required for most smart switches) and extra wire capacity in their ceiling canopies to accommodate additional control modules. They also provide blank wall plates or low-voltage rings for mounting smart controllers. For beginners planning future automation, kits mentioning “smart-ready” design save the headache of rewiring later. The instructions should include QR codes linking to compatible smart control products and installation videos.
Multi-Fan Control Systems
Large rooms or open floor plans sometimes require multiple fans operating in sync. Advanced installation kits for these scenarios include master-slave control wiring or RF synchronization modules that link fans without running additional wires between them. While complex for absolute beginners, kits designed for multi-fan installations provide clear wiring schematics and use color-coded wires that simplify the process. They also include warning labels and circuit diagrams showing how to properly parallel-connect multiple fans to a single control point without overloading the switch or creating interference.
Safety Features That Matter Most
Overload Protection Mechanisms
Quality installation kits incorporate overload protection in their electrical components, particularly in control modules and remote receivers. These thermal cutoffs automatically disconnect power if the motor draws excessive current, preventing fire hazards from seized bearings or electrical faults. While not visible in the hardware itself, this protection is documented in the kit’s specifications. Beginners should look for kits that explicitly mention integrated circuit breakers or thermal fuses, as this indicates professional-grade safety engineering rather than bare-minimum compliance.
Anti-Vibration Technology
Vibration doesn’t just create noise—it gradually loosens mounting hardware and fatigues electrical connections. Premium kits include rubber isolation washers between mounting brackets and the ceiling, vibration-dampening downrod couplers, and balanced blade mounting systems. These features are especially important for beginners who may not perfectly balance their fan during installation. Kits with comprehensive anti-vibration packages often include a small balancing kit with clip-on weights, addressing vibration at the source rather than just masking symptoms.
Heat Dissipation Features
Electrical connections generate heat, especially when controlling fan speed through resistance-based wall controls. High-quality kits include heat-resistant wire nuts rated for higher temperatures and ceiling canopies with ventilation slots that prevent heat buildup. For installations in insulated ceilings, kits should mention compatibility with IC-rated (Insulation Contact) boxes that won’t overheat when buried in insulation. This attention to thermal management prevents long-term degradation of wire insulation and connection integrity.
Certification Marks to Look For
Beyond the basic UL (Underwriters Laboratories) mark, advanced kits carry additional certifications like ETL (Edison Testing Laboratories) or CSA (Canadian Standards Association), indicating more rigorous testing. For outdoor applications, look for IP (Ingress Protection) ratings that specify dust and water resistance levels. Beginners should prioritize kits with multiple certification marks, as this demonstrates third-party verification of safety claims. The packaging should display these marks prominently; their absence is a red flag regardless of how impressive the kit’s other features appear.
Installation Tips for First-Timers
Pre-Installation Checklist
Success begins before you open the box. Quality kits include a comprehensive pre-installation checklist covering power verification, support structure assessment, and component inventory. This list should prompt you to photograph the existing wiring, measure ceiling height and slope, and confirm you have all necessary tools. The best kits organize hardware in labeled blister packs that correspond to installation steps, preventing confusion about which screw goes where. This systematic approach prevents the common beginner mistake of skipping critical preparation steps in eagerness to see the finished product.
Step-by-Step Wiring Walkthrough
Electrical connections intimidate most beginners, so clear wiring diagrams are essential. Look for kits with color-coded wires that match the instructions, plus wire nuts pre-filled with conductive grease for corrosion resistance. The guide should show both typical wiring scenarios (single switch, dual switch, remote control) and explain the purpose of each wire: hot, neutral, ground, and traveler wires for multi-switch setups. Some premium kits include wire labels or numbered tags that you apply before disconnecting the old fixture, making it nearly impossible to connect wires incorrectly during reassembly.
Balancing Your Fan for Smooth Operation
Even perfectly installed fans wobble if blades aren’t balanced. Comprehensive kits include a blade balancing kit with a plastic clip and adhesive weights. The instructions should guide you through the process: running the fan at high speed, identifying the wobble, clipping the weight to different blades until you find the sweet spot, then permanently attaching the weight. This simple process, often overlooked by beginners, makes the difference between a whisper-quiet fan and one that sounds like a helicopter. Kits that emphasize balancing as a mandatory final step demonstrate a commitment to proper installation rather than just assembly.
Common Mistakes to Avoid
The best installation kits feature a “Common Pitfalls” section that addresses beginner errors: over-tightening mounting screws that strip wood, using wire nuts that are too small, or installing the fan too close to walls. They explain why each mistake matters and how to fix it if you’ve already gone too far. Some kits even include a troubleshooting flowchart that helps diagnose problems like non-functioning fans, wobbling, or noisy operation. This educational component turns the installation guide into a learning resource that builds your DIY confidence for future projects.
Troubleshooting Common Issues
Wobbling and Vibration Problems
Post-installation wobbling rarely indicates a defective fan—it’s usually installation-related. Your kit’s troubleshooting section should systematically address potential causes: loose mounting hardware, unbalanced blades, or improper downrod length. Quality kits include a diagnostic checklist that starts with simple fixes (tightening blade screws) and progresses to more involved solutions (rebalancing). They also explain when wobbling indicates a serious problem requiring professional help, such as structural ceiling issues or a bent motor shaft that can’t be fixed through adjustment alone.
Electrical Hum and Noise
That annoying hum often stems from incompatible speed controls or loose electrical connections. Installation kits should explain the difference between motor hum (normal at low speeds) and electrical buzz (indicating a problem). They should specify compatible control types—particularly that standard dimmer switches must never control fan motors. Some kits include a small bottle of dielectric grease to apply to connections, reducing electrical resistance and noise. The guide should also cover grounding issues, as improper grounding creates interference that manifests as audible hum through the fan’s metal components.
Speed Control Malfunctions
When fans won’t change speeds or only operate at one speed, the issue usually lies in the control wiring or receiver. Advanced kits include a bypass test procedure that temporarily connects the fan directly to power, bypassing controls to isolate the problem. They also provide wiring diagrams for common control failures and explain how to test wall switches with a multimeter. For remote-controlled fans, kits should include instructions for reprogramming receivers and transmitters, often involving simple button sequences that reset the RF pairing without requiring an electrician.
When to Call a Professional
Perhaps the most important section in any beginner guide is knowing your limits. Quality kits explicitly state scenarios that require professional intervention: aluminum wiring, lack of ground wire, insufficient circuit capacity, or structural concerns. They provide clear “stop points” where continuing DIY poses safety risks. This honesty protects both the user and the manufacturer, while empowering beginners to make smart decisions. Look for kits that include a “Find an Electrician” resource or checklist of qualifications to seek in a professional, demonstrating a commitment to safety over sales.
Frequently Asked Questions
What if my electrical box isn’t rated for fan support? You’ll need to install a fan-rated junction box before proceeding. Most kits include replacement boxes or reinforcement brackets. Turn off power, remove the old box, and install the new one following the kit’s specific instructions for your ceiling type.
Can I install a ceiling fan where a light fixture currently exists? Usually yes, but you must verify the electrical box is fan-rated and the circuit can handle the additional load. Light fixtures often use lightweight boxes that cannot support a fan’s weight and movement. Always check the box’s rating label inside.
How do I know what downrod length I need? Measure your ceiling height and subtract 9 feet, then divide by 2. Add 3 inches for standard mounting. Most kits include reference charts. For ceilings under 9 feet, use a flush-mount kit. For ceilings over 10 feet, you’ll likely need a 12-24 inch downrod.
What’s the difference between damp-rated and wet-rated kits? Damp-rated kits work for covered outdoor areas protected from direct rain. Wet-rated kits handle direct water exposure. Using a damp-rated kit in a wet location violates electrical codes and creates shock hazards. Check your location’s exposure before purchasing.
Do I need an electrician if I’m just replacing an existing fan? If the old fan was properly installed on a fan-rated box and you’re not modifying wiring, you can likely DIY. However, if you discover aluminum wiring, no ground wire, or an overloaded circuit, call a professional. When in doubt, prioritize safety.
Why does my new fan wobble even though I installed it correctly? Blades often need balancing even with perfect installation. Use the balancing kit included in most quality packages. Run the fan at high speed, clip the balancing weight to each blade sequentially to find the heavy one, then permanently attach the weight to that blade’s top.
Can I use a dimmer switch to control fan speed? Never use a standard light dimmer for a ceiling fan motor. This creates electrical hum, damages the motor, and poses fire hazards. Use only controls specifically labeled for ceiling fan use. Quality kits specify compatible control types in their documentation.
What tools will I definitely need that aren’t in the kit? You’ll need a ladder, screwdriver set, wire strippers, voltage tester, and pliers. Some installations require a drill. The kit’s instructions should list required tools before step one. Don’t start until you have everything—mid-project hardware store runs are frustrating.
How long should a ceiling fan installation take for a beginner? Plan for 2-3 hours for a standard installation, plus extra time for reading instructions and double-checking your work. Complex scenarios like vaulted ceilings or remote controls add 1-2 hours. Rushing leads to mistakes, so allocate a full afternoon for your first project.
What should I do if my ceiling is too high for the included downrod? Contact the manufacturer for longer downrods, which are typically available in 12, 24, 36, and 48-inch lengths. Never piece together multiple downrods or use threaded rod from the hardware store. The kit’s couplers and set screws are engineered for specific lengths and weights.
See Also
- How to Solve Ceiling Fan Instability with the 10 Best Ceiling Fan Installation Kits in 2026
- 10 Best Ceiling Fan Hookup Kits for Fast and Safe Installation in 2026
- 10 Essential Ceiling Fan Installation Kits Every DIYer Needs in 2026
- 10 Most Durable Ceiling Fan Mounting Kits Based on Real User Reviews in 2026
- 10 Best Ceiling Fan Mounting Kits for Wobbly Fans This Year